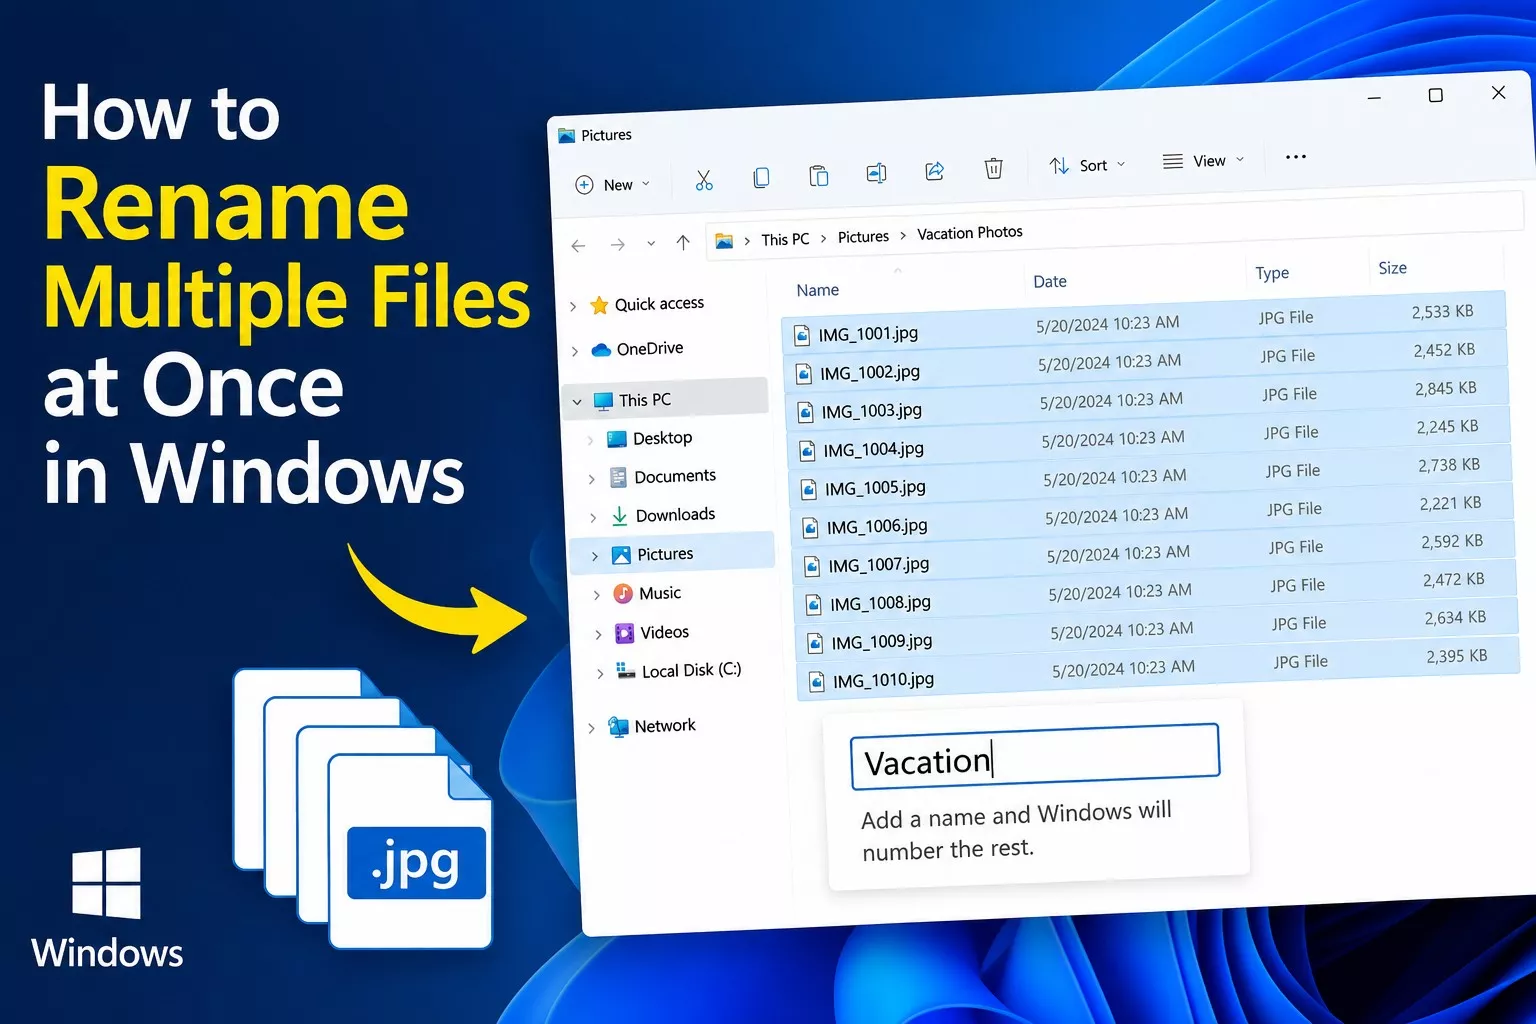

If you’ve ever dumped a few hundred photos from your phone onto your PC and ended up with a folder full of files named IMG_2043.jpg, IMG_2044.jpg, and so on, you know how annoying it is to rename them one by one. The good news is you don’t have to. Windows actually has a few built in ways to rename a whole batch of files in seconds, and if you need something more powerful, there are free tools that go even further.
Here’s a rundown of the different ways to do it, from the quickest built-in trick to more advanced options.
Method 1: The Simple File Explorer Trick
This is the fastest option and works without installing anything.
- Open the folder containing the files you want to rename
- Select all the files you want to rename (Ctrl + A selects everything, or hold Ctrl and click individual files)
- Right click the first file and choose Rename (or just press F2)
- Type the new name and hit Enter
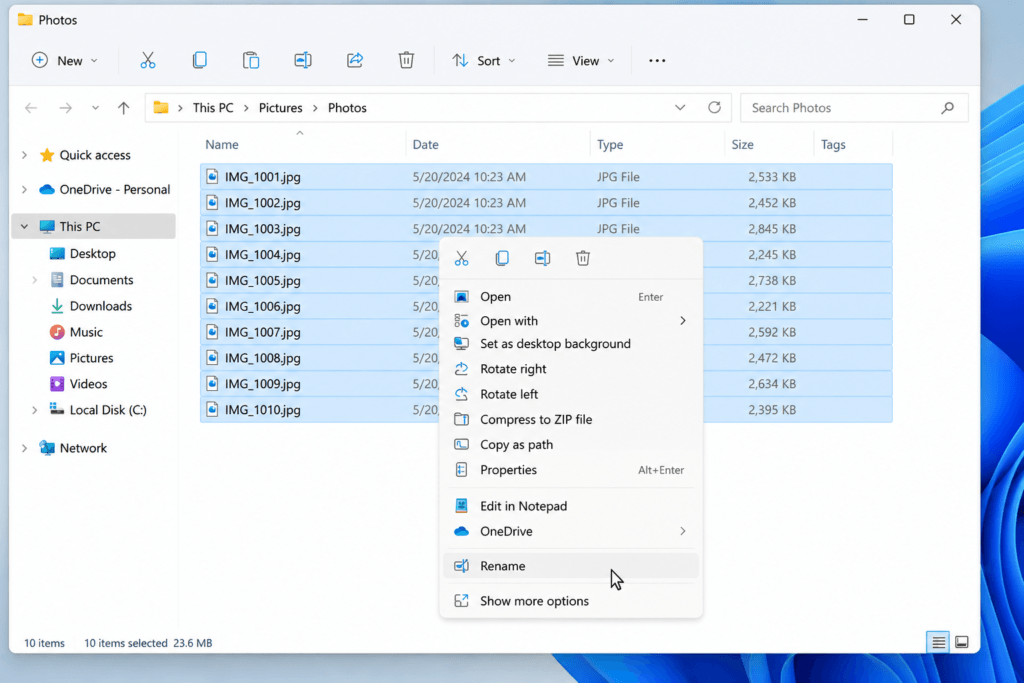
Windows will rename the first file exactly as you typed it, and then automatically number the rest, so if you type “Vacation,” you’ll end up with Vacation.jpg, Vacation (1).jpg, Vacation (2).jpg, and so on.
It’s simple, but it only works well when you’re fine with sequential numbering. If you need something more customized, keep reading.
Method 2: PowerShell for More Control
If you want more flexibility like adding a date, changing file extensions in bulk, or renaming based on a pattern PowerShell is worth learning, even if you’re not usually a command line person.
- Open the folder you want to work in
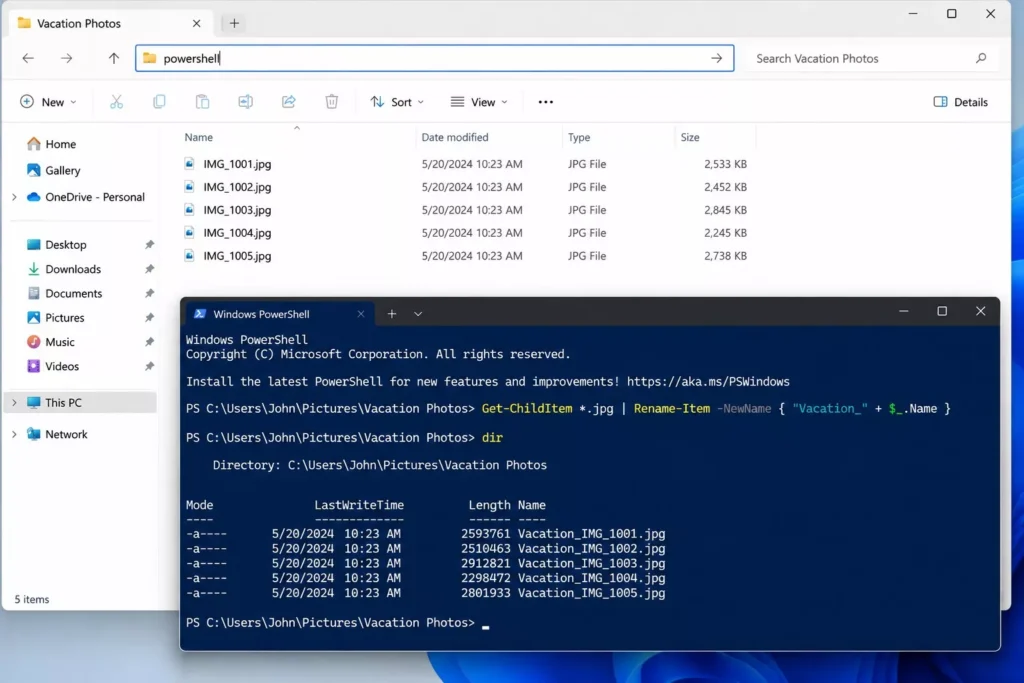
- Type
powershellin the address bar and hit Enter this opens PowerShell directly in that folder - Run a command depending on what you need. For example, to rename all files sequentially:
powershell
Get-ChildItem *.jpg | Rename-Item -NewName { "Vacation_" + $_.Name }This adds “Vacation_” in front of every JPG file’s existing name. You can tweak the pattern to fit whatever naming style you want.
It looks intimidating at first, but once you get the hang of a couple of basic commands, it becomes a huge time saver, especially for repetitive renaming tasks.
Method 3: Command Prompt (Old School but Still Works)
If PowerShell feels like overkill, the classic Command Prompt still gets the job done for simpler cases.
- Open the folder, type
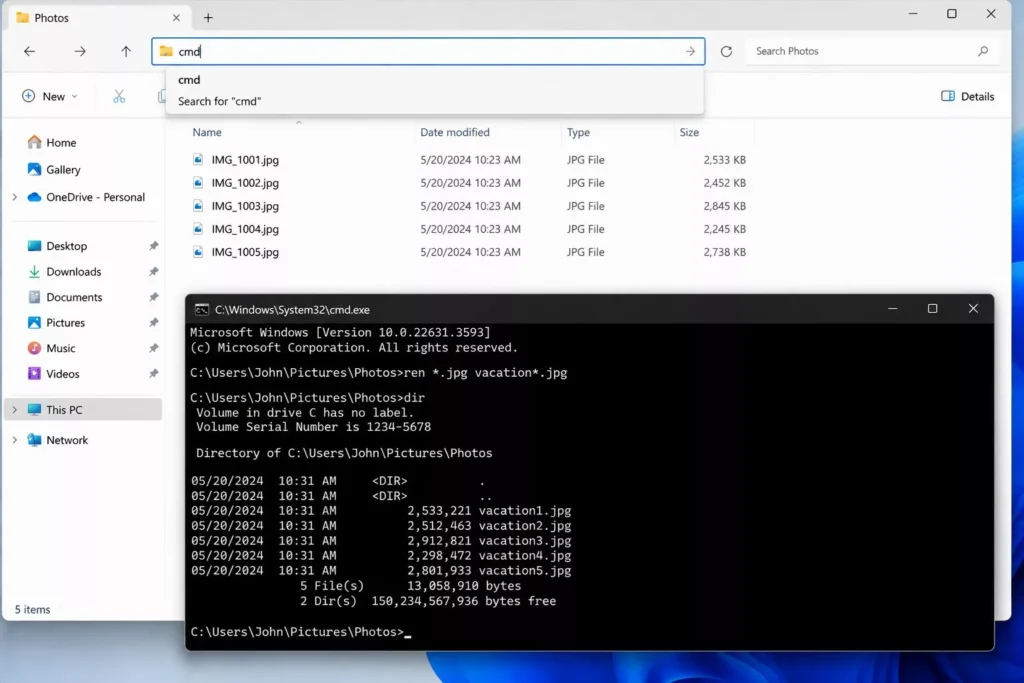
cmdin the address bar, and press Enter - Use the
rencommand. For example:
ren *.jpg vacation*.jpgThis works well when your files already share a naming pattern and you just want to swap part of the name.
Method 4: Bulk Rename Utility (Best for Serious Renaming)
If you regularly rename large batches of files, or you want to do things like remove specific text, change letter case, add prefixes/suffixes, or insert dates automatically, a dedicated tool makes life a lot easier. Bulk Rename Utility is a free, well-known option that Windows users have relied on for years.
- Download and install Bulk Rename Utility
- Open it and navigate to your folder
- Select the files you want to rename
- Use the various fields (Name, Replace, Case, Numbering, etc.) to build your renaming pattern
- Preview the changes before applying them
- Click Rename once you’re happy with the result
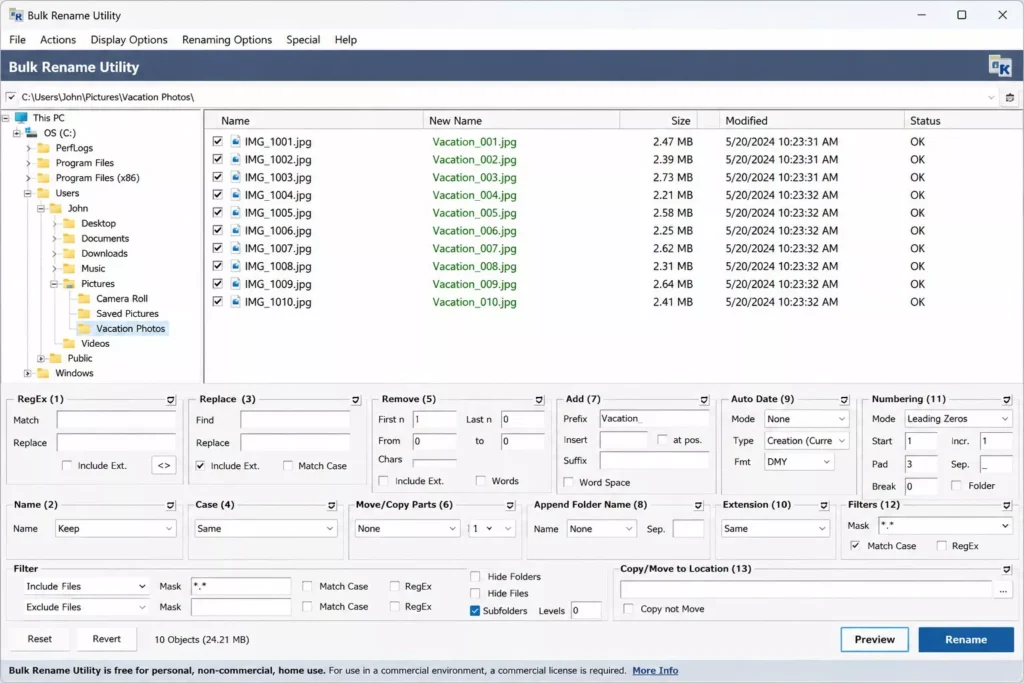
The interface looks a little dated, but it’s genuinely powerful once you get used to it, and the live preview means you won’t accidentally mess up your files.
Method 5: Third Party Tools with a Modern Interface
If Bulk Rename Utility feels too cluttered, tools like Advanced Renamer or PowerToys’ PowerRename ( made by Microsoft ) offer a cleaner experience.
PowerRename, in particular, is worth mentioning since it’s officially built by Microsoft and integrates right into File Explorer:
- Install Microsoft PowerToys ( free, available on GitHub or the Microsoft Store )
- Right click the files you want to rename in File Explorer
- Select PowerRename from the context menu
- Use search and replace or regular expressions to define how the files should be renamed
- Preview the results live, then apply
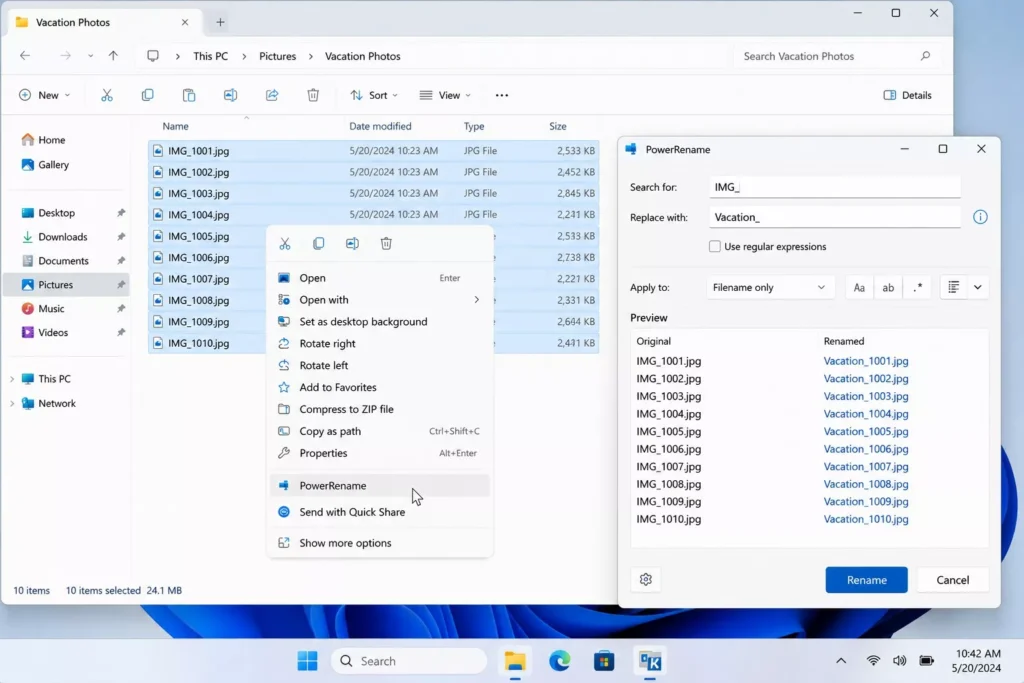
It supports find and replace, regex for advanced users, and even lets you preview every single filename before committing.
How to Undo a Bulk Rename If Something Goes Wrong
Mistakes happen, especially if you’re renaming hundreds of files at once. If you just renamed files using File Explorer, PowerToys, or Bulk Rename Utility and something looks off, don’t panic.
- File Explorer / PowerToys: Press Ctrl + Z right after the rename. Windows usually remembers the last batch rename action and can undo it in one step.
- PowerShell: Undo isn’t built in, so it helps to run a “test” command first using
-WhatIfat the end of your Rename-Item command. This shows you what would happen without actually renaming anything, so you can catch mistakes before they happen. - Bulk Rename Utility: The tool keeps a rename history, and you can reverse the last operation from within the app itself.
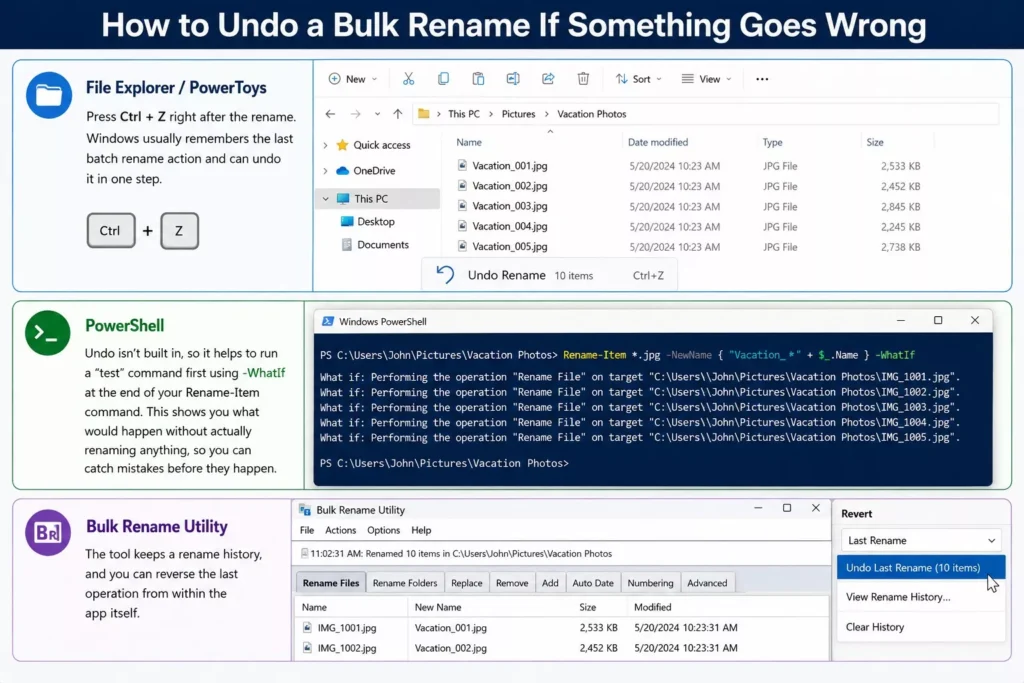
This is exactly why previewing changes before hitting Rename is worth the extra ten seconds, it’s much easier to catch a mistake before it happens than to fix it afterward.
Renaming Files Based on Date or Folder Name
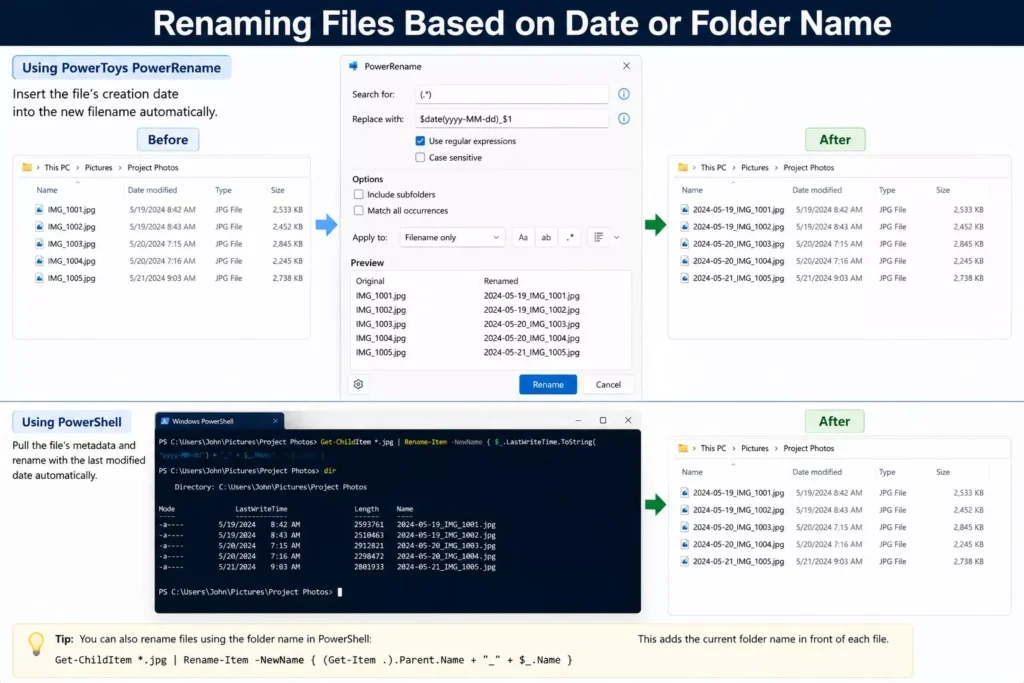
A common request is renaming files using their creation date or the folder they’re in useful for organizing photos, invoices, or project files chronologically.
With PowerToys PowerRename, you can use the built-in date and counter options to automatically insert the file’s creation date into the new filename. With PowerShell, you can pull the file’s metadata directly:
powershell
Get-ChildItem *.jpg | Rename-Item -NewName { $_.LastWriteTime.ToString("yyyy-MM-dd") + "_" + $_.Name }This renames each file with its last modified date at the front, followed by its original name handy for keeping photos or documents sorted in the right order without manually checking each file’s properties.
A Few Tips Before You Start
- Always back up important files before doing a bulk rename, just in case something doesn’t go as planned
- Use the preview feature in whichever tool you choose it saves you from accidentally renaming the wrong batch
- If your files need to stay in a specific order ( like photos from an event ), make sure your numbering pattern reflects that before renaming