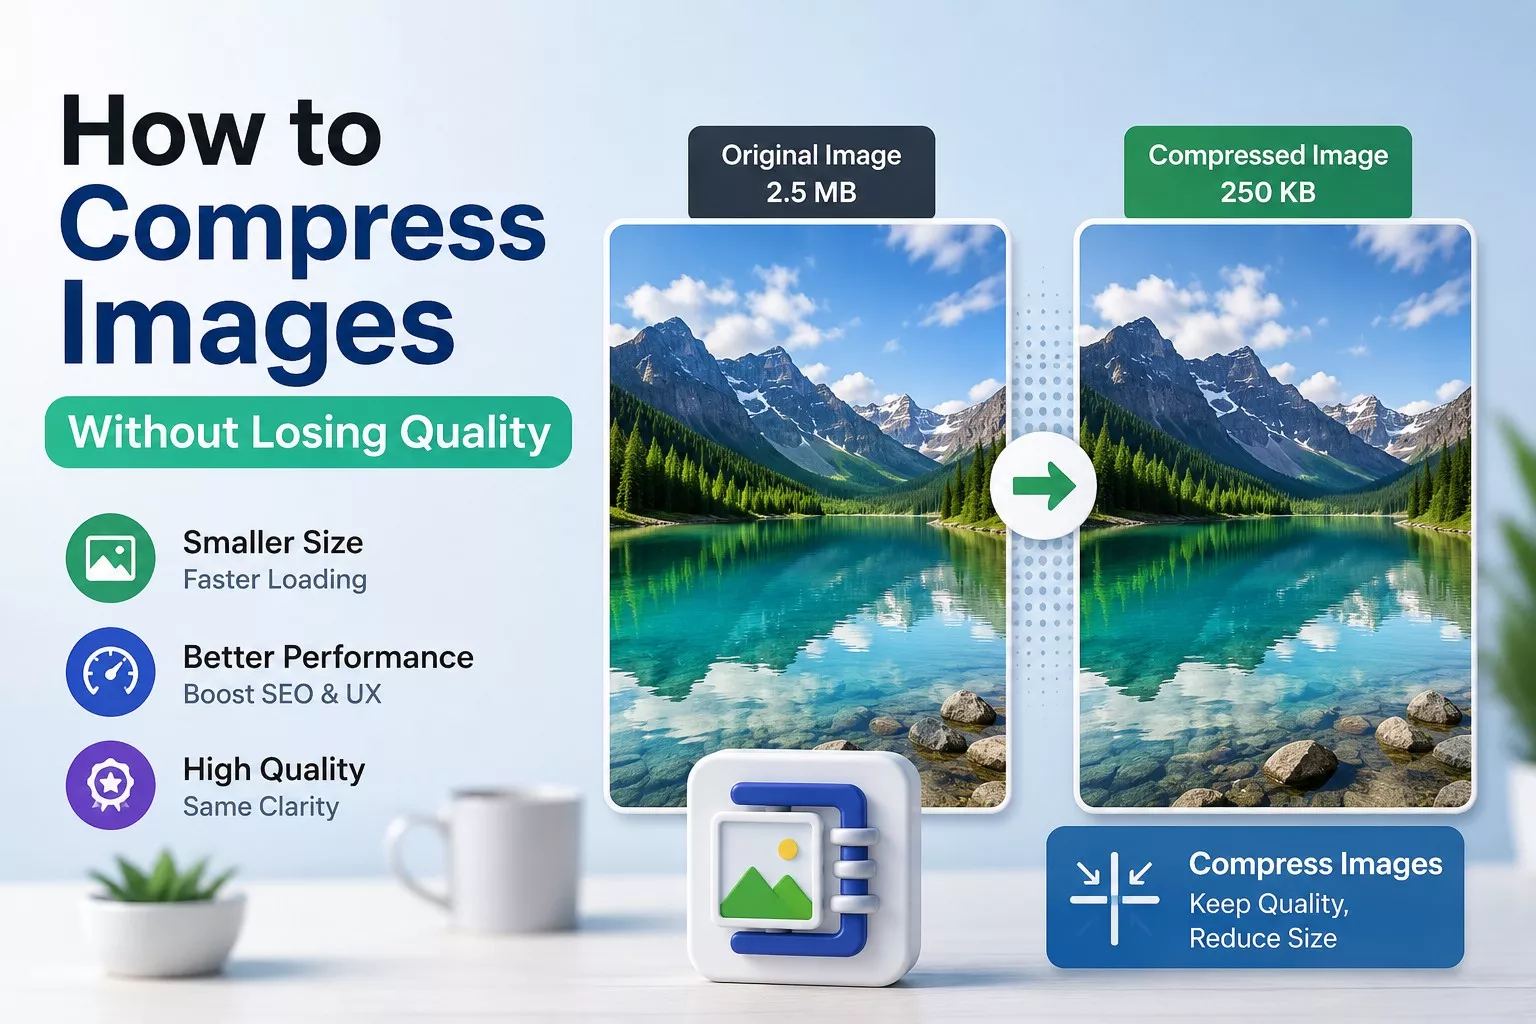

Images make websites look professional and engaging, but large image files can significantly slow down your website. A slow loading website not only frustrates visitors but also hurts your search engine rankings. The good news is that you can compress images without losing quality, allowing your website to load faster while maintaining sharp, professional looking visuals.
In this comprehensive guide, you’ll learn what image compression is, why it matters, the best tools to use, and step by step methods to reduce image file size without sacrificing image quality.
What Is Image Compression?
Image compression is the process of reducing an image’s file size while preserving as much visual quality as possible.
The goal is simple:
- Faster website loading
- Better user experience
- Improved SEO rankings
- Reduced storage space
- Lower bandwidth usage
There are two main types of image compression:
1. Lossless Compression
Lossless compression removes unnecessary data while preserving every pixel.
Advantages:
- No quality loss
- Perfect for logos
- Ideal for screenshots
- Great for graphics and icons
Examples:
- PNG
- SVG
- Some WebP images
2. Lossy Compression
Lossy compression removes some image data that most people cannot notice.
Advantages:
- Much smaller file sizes
- Excellent for photographs
- Faster loading
Disadvantages:
- Slight quality reduction if compressed too much
Examples:
- JPEG
- AVIF
- WebP
When done correctly, visitors usually cannot tell the difference.
Why Compress Images?
Large images are one of the biggest reasons websites load slowly.
Benefits include:
- Faster page speed
- Better Google rankings
- Improved Core Web Vitals
- Lower hosting costs
- Better mobile performance
- Higher conversion rates
- Reduced bounce rate
A page with properly optimized images can load several seconds faster than one using uncompressed files.
Best Image Formats
Choosing the correct format is the first step toward optimization.
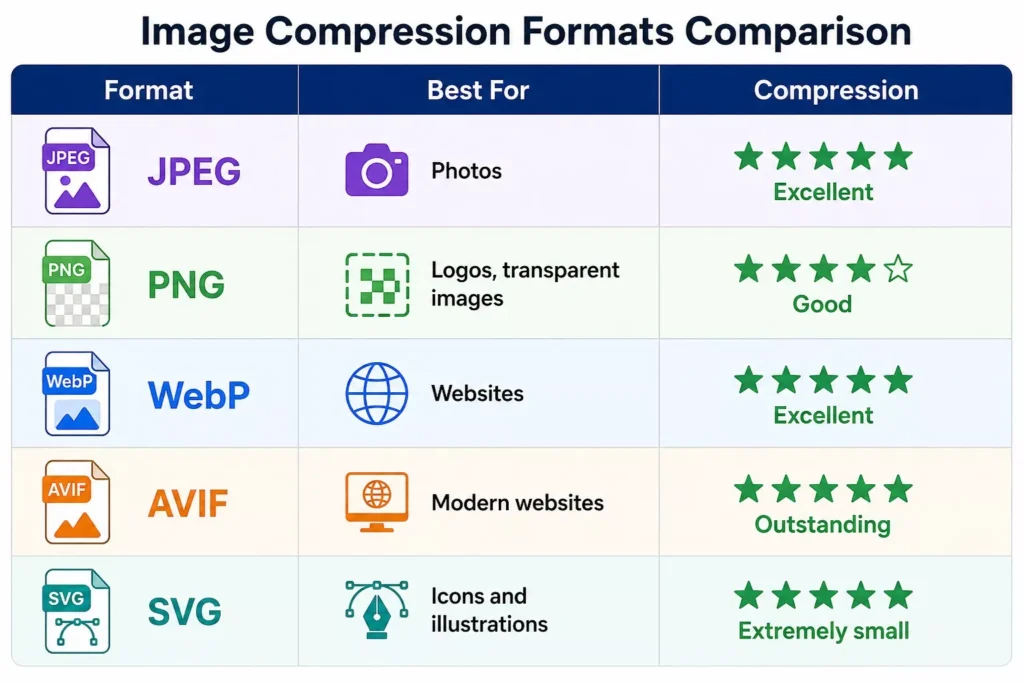
For most websites:
- Use JPEG for photographs.
- Use PNG only when transparency is needed.
- Use WebP whenever possible.
- Use SVG for logos and icons.
- Use AVIF for maximum compression if supported.
Compress Images Without Losing Quality
Method 1: Use Online Compression Tools
If you only have a few images, online tools are the easiest solution.
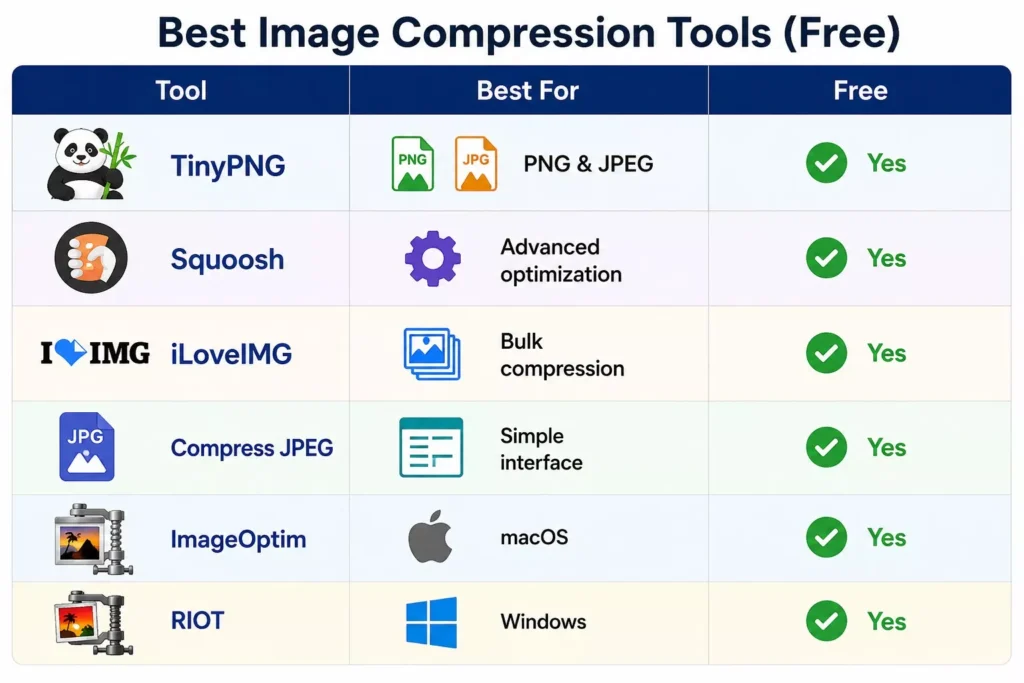
Popular options include:
- TinyPNG
- TinyJPG
- Squoosh
- Compress JPEG
- iLoveIMG
- ImageOptim (Mac)
Simply:
- Upload the image.
- Wait for compression.
- Download the optimized version.
Most tools automatically preserve image quality while reducing file size.
Method 2: Convert Images to WebP
WebP is one of the best image formats available today.
Benefits:
- Up to 35% smaller than JPEG
- Better compression than PNG
- High quality images
- Supported by all modern browsers
Many websites have reduced image sizes dramatically just by switching to WebP.
Method 3: Resize Before Uploading
Many people upload huge images directly from smartphones or cameras.
For example:
Original image:
- 6000 × 4000 pixels
- 8 MB
Website display size:
- 1200 × 800 pixels
There’s no reason to upload the larger version.
Resize it first, then compress it.
Method 4: Adjust JPEG Quality
When exporting JPEG images, choose quality between:
- 75%
- 80%
- 85%
These settings usually provide an excellent balance between quality and file size.
Most visitors won’t notice any visible difference.
Method 5: Remove Metadata
Photos often contain hidden information like:
- GPS location
- Camera model
- Date
- Lens settings
- Device information
Removing metadata can reduce file size without affecting image quality.
Method 6: Use Photoshop Export Options
Adobe Photoshop includes excellent optimization tools.
Use:
File > Export > Save for Web
Recommended settings:
- JPEG High
- Quality: 80
- Convert to sRGB
- Progressive JPEG enabled
- Optimize enabled
This produces smaller images while maintaining excellent visual quality.
Method 7: Compress Images in Canva
If you create graphics in Canva:
- Download as WebP (if available)
- Use JPG for photos
- Lower quality slightly when exporting
- Resize before downloading
This can reduce image size significantly.
Method 8: Use WordPress Image Optimization Plugins
If you use WordPress, plugins can compress every uploaded image automatically.
Popular plugins include:
- ShortPixel
- Imagify
- Smush
- EWWW Image Optimizer
- Optimole
Many also convert images to WebP automatically.
Best Free Image Compression Tools
Recommended Compression Settings
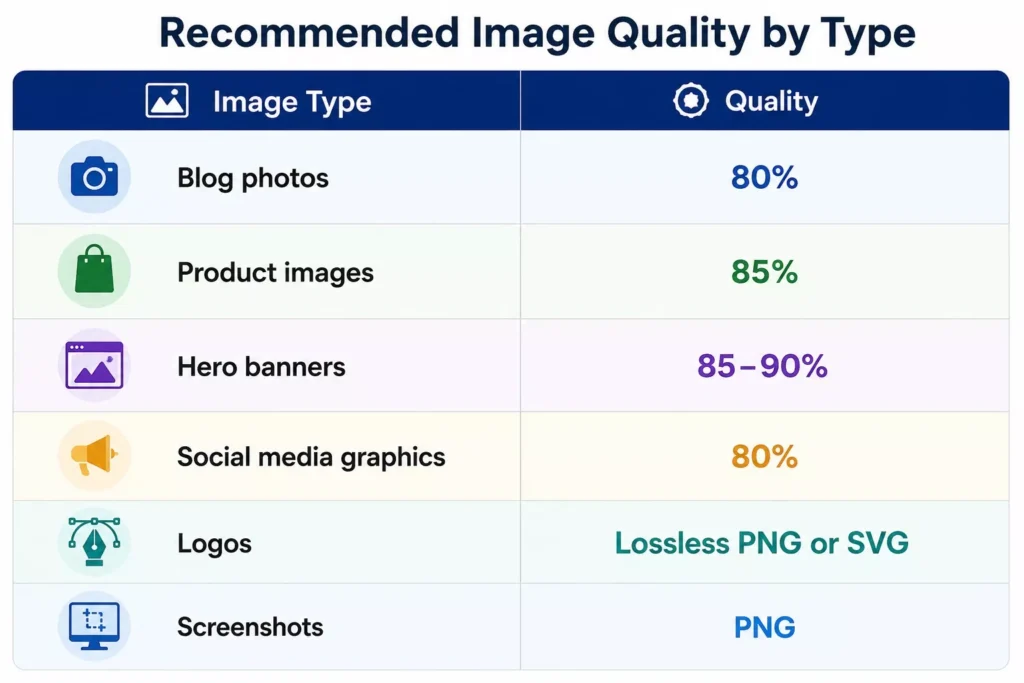
Image Compression Tips for SEO
Search engines value fast loading websites. Follow these best practices:
- Compress every image before uploading.
- Use descriptive filenames (e.g.,
blue-running-shoes.jpg). - Add descriptive alt text.
- Choose modern formats like WebP or AVIF.
- Resize images to the display dimensions.
- Enable lazy loading.
- Use responsive images (
srcset) for different screen sizes. - Deliver images through a Content Delivery Network (CDN).
These practices improve page speed, accessibility, and overall SEO performance.
Common Mistakes to Avoid
Avoid these image optimization mistakes:
- Uploading images directly from your phone or camera.
- Using PNG for every image.
- Compressing images multiple times.
- Choosing maximum JPEG quality (100%).
- Uploading images much larger than needed.
- Ignoring mobile optimization.
- Forgetting to use modern image formats.
Frequently Asked Questions (FAQs)
Does compressing images reduce quality?
Not necessarily. Lossless compression preserves image quality completely, while well configured lossy compression results in little to no noticeable difference for most users.
What is the best image format for websites?
WebP is generally the best choice because it offers excellent quality with smaller file sizes. AVIF can provide even better compression but may require compatibility checks.
Is PNG better than JPEG?
PNG is better for logos, icons, screenshots, and transparent images. JPEG is better for photographs because it creates much smaller files.
Can image compression improve SEO?
Yes. Smaller images help pages load faster, improve Core Web Vitals, enhance user experience, and can contribute to better search engine rankings.
What is the ideal image size for websites?
For most blog posts, images between 1200 – 1600 pixels wide and under 200 KB provide a good balance between quality and performance. Hero images may be larger but should still be optimized.